.jpg)
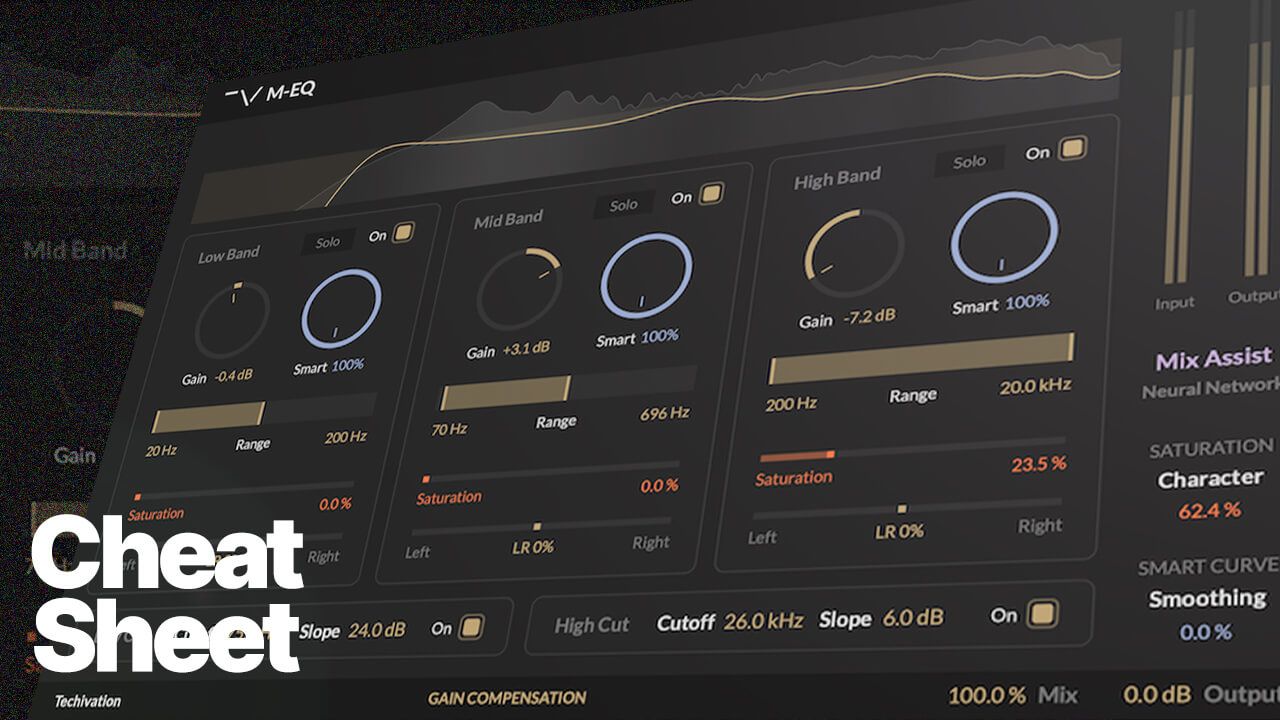
Summary: M-Imager is a spectral stereo expander built for mastering-grade precision. Its phase-only, time varying spectral decorrelator enhances the Side information while keeping the Mid (centre) intact, delivering natural width, razor-sharp transients, and tonal transparency.
Stereo imaging is one of those areas where a little can go a long way, and where the wrong move can unravel an otherwise perfect mix. Many wideners smear transients, fall apart in mono, or add a hollow, chorus shimmer that feels like a cheap trick.
M-Imager was built to avoid those pitfalls. Its phase-only, time varying spectral decorrelator enhances the Side information while keeping the Mid (centre) perfectly intact. That means natural width, razor-sharp transients, and tonal transparency, whether you are stereoising a mono track or enhancing a full master.
Here is your engineer’s cheatsheet: 10 ways to get elite results with M-Imager.
1) Start with mono integrity
Push width, then check your track summed to mono. Because M-Imager works on the Side channel, your mono sum stays unaltered. Make this a habit. If something falls apart in mono, it won't be M-Imager, so check other processors in your chain.
2) Stereoise mono without faking it
On a mono source, dial in modest width first. Then raise “Mono Cutoff” of the Side EQ to keep everything below 120 to 150 Hz centred and let mids and highs breathe outward. The result is believable stereo depth that feels natural, not manufactured.
3) Keep transients where they belong
M-Imager is engineered to preserve attack shape. Avoid stacking heavy modulation or ensemble effects after it on the same bus, as those can still blur protected transients. If you are also using transient shapers or clipper-style limiters, audition both processing orders and keep whichever preserves the groove best.
M-Imager Walkthrough Video
Watch the M-Imager walkthrough for a practical overview of controls and use cases:
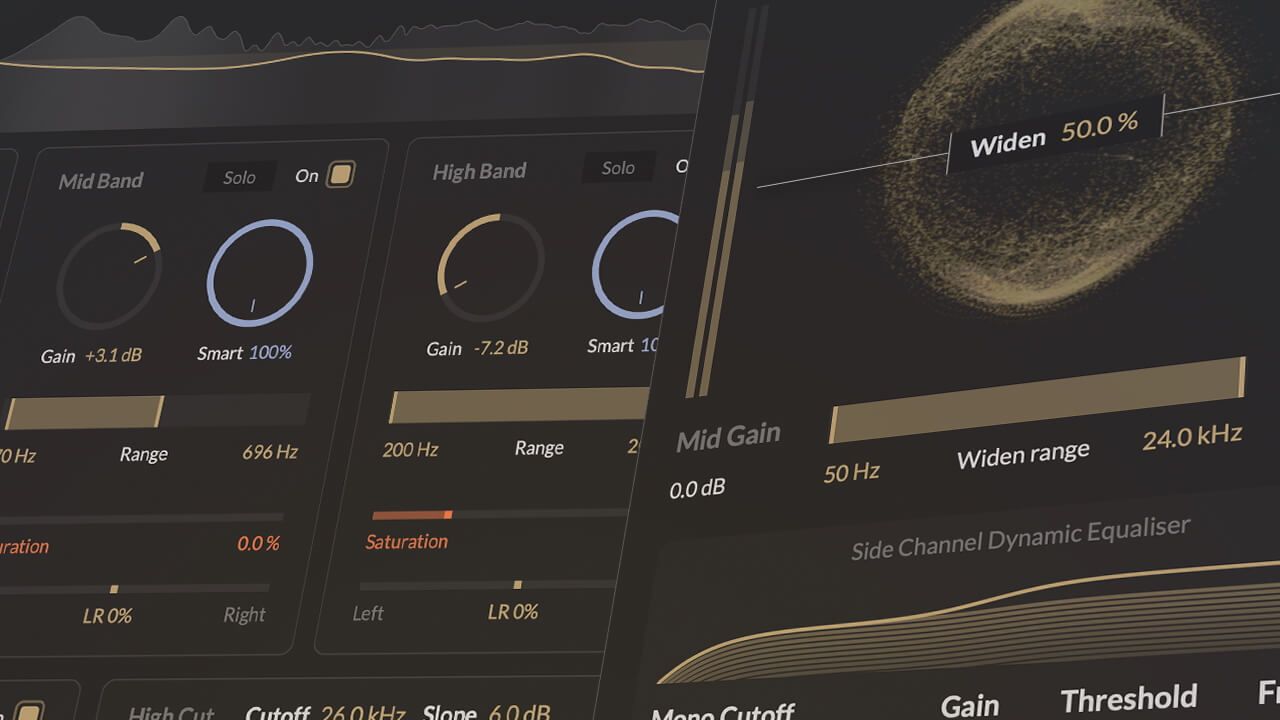
4) Focus widening with range control
Use the “Widen range” control to decide which frequencies are expanded. For example, set the lower bound around 200–300 Hz to keep bass instruments locked in the middle while giving guitars, keys, and vocals more dimension above. This ensures the foundation stays solid while the mix opens up where it matters.
5) Add air with the dynamic Side EQ
Boost the Side channel above 8–12 kHz with the high shelf to add openness and sparkle to cymbals, pads, or reverb tails. Enable “Threshold” so the boost responds dynamically, activating more strongly when the track gets louder. This makes brightness and width feel musical rather than static.
6) Control width when brightness gets harsh
If high-energy sections sound too wide or aggressive, flip the Side EQ shelf to cut gently above 5–8 kHz. Raise the “Threshold” so this cut only engages on peaks. That way, dense passages stay smooth and controlled, while quieter moments remain open and spacious.
7) Widen the kit, keep the punch
On a drum bus, anchor kick and snare in the middle. Roll off Side content to mono below about 120 Hz using “Mono Cutoff” to keep the lows solid. Next, widen overheads and ambience by setting the minimum frequency of “Widen range” to 250 - 500 Hz and raising the “Widen” amount. Because transients remain phase aligned, you get size and impact without the softening typical wideners cause.
8) Process reverb and delay returns, not the source
Insert M-Imager on reverb or delay sends. Push “Widen” control harder than you would on an insert, then brighten slightly with a gentle Side EQ high shelf boost. Increase the “Threshold” of the Side EQ until the boost is only applied for louder peaks to make the tail breathe with the dynamics of your track. This is excellent for lush pads or vocal reverbs.
9) Lean into stability on sustained material
Pads, strings, and sustained tones expose the weakness of static convolution-based wideners: unnatural and hollow sound of fixed phase offsets. M-Imager’s controlled phase offset evolution keeps the stereo field natural and stable. Push the width boldly, then tidy with a Side EQ high shelf cut around 1 to 3 kHz if the image starts to crowd the vocal.
10) Mastering moves: precision above all
In mastering, subtlety is everything. Just a small amount of “Widen” with a carefully chosen “Widen range” can transform the depth of the mix. If a mix already has aggressive widening, use M-Imager’s Side EQ to tame the excessive Side energy. Dial in a gentle high shelf cut, then raise the “Threshold” to make sure it is applied only when the widening becomes overbearing.
Bonus chain tips
On a mix bus, try M-Imager after bus compression so the compressor does not react to newly generated Side energy.
In stem mastering, use it selectively: modest widening on vocals, precise widening on drums for overheads and rooms, bolder widening on harmonic beds.
The bottom line
M-Imager is an engineered solution. By combining organic width, transient preservation, and tonal transparency, it delivers a stereo image that sounds like it was part of the original performance, not bolted on afterwards. Use it with restraint, refine with the Side EQ, and trust that what you hear in your studio is what listeners will hear everywhere. That is the difference between a widening trick and a mastering-grade stereo expander.
Try M-Imager 14-Days for Free
Click here to download your free trial and experience how M-Imager delivers natural width, perfect mono compatibility, and stable stereo dimension.
![M-EQ Review By Czar [Video]](https://cdn.sanity.io/images/9uzzx98j/production/341fd252af5cfdce3815b27290e6ccf6b1185b98-1280x720.jpg)